
Regular pendant lamps or spotlights often have limited options. As a result, you cannot light the room 100% the way you like. A dark corner, a lamp that is too bright or a spotlight that falls just 10 cm too far to the right? It gets in the way of enjoying a good book in your favourite place on the settee. Read on to discover exactly what the TRACK is, how you instal it and what the possibilities are. A sneak peek: they are endless.
Why get a TRACK rail system?
The innovative rail system is the latest new trend in the world of lighting. It gives you the freedom to hang and change the lamps you choose at any time. So you can always create the ideal setting.
One day you might only use pendant lamps, spotlights another day or a combination of the two. You have total freedom.
What possibilities does a TRACK system offer?
A rail system is made to be practical. Expand your lighting, improvise and change in a few clicks. At Lucide, focus on a sleek and modern design. Practical does not have to be ugly, and design does not have to be impractical.
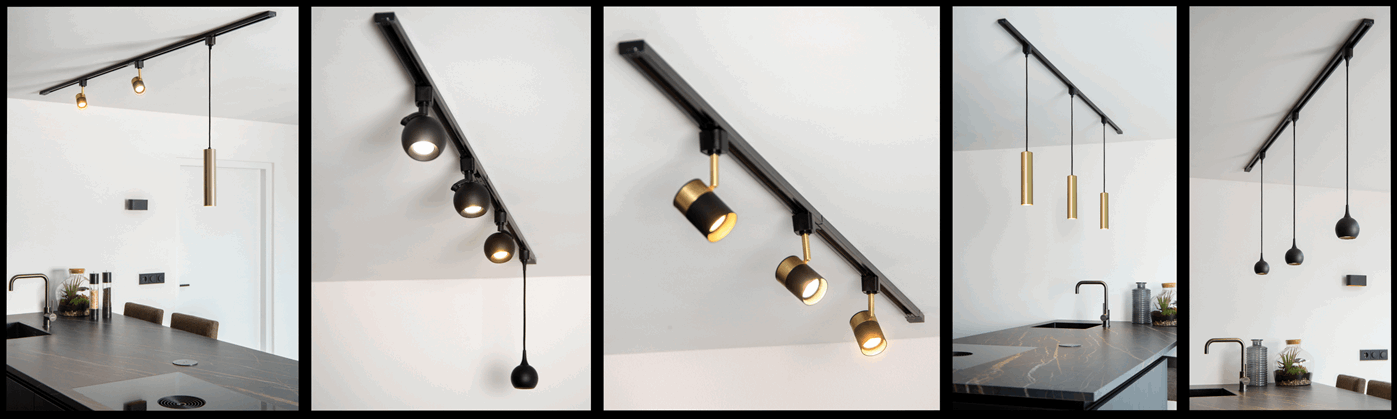
You can expand the Track system to a maximum of 400m, 3500V and 5 lamps per metre of track. He track has 5 different connectors. Choose the direction you want your TRACK to go with the simple-to-use plug-in connectors.
Choose from among 7 lamps specially adapted for the Track system. But that is not the end of it: the Pendant Adapter allows you to instal a larger selection of Lucide pendant lamps on the rail system. For more on how you can easily expand the TRACK, read further.
How do I instal my TRACK?
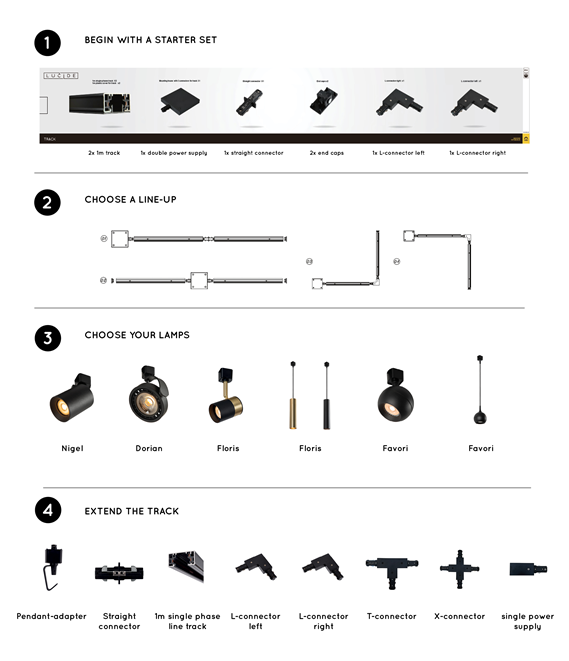
To start, you need a TRACK starter set. This includes all the basic accessories to get you started. Have a starter set? Then we can get started!
- Determine where your electrical connection is; this is where the ‘mounting house’ must be located. This can be anywhere on your track system.
- Put your track together on the ground and make adjustments until you are satisfied with the composition. You can be sure that all the pieces fit together seamlessly.
- Mark the starting and ending point of the track on the ceiling.
- Start at the ‘mounting house’ and work to the end points using the right connectors. Switch off the electricity when connecting the electrical lines.
!TIP! The track has sides with 1 and 2 groves. Kep these on the same side along the entire length of the track.
- Easily screw the track to the ceiling through the provided holes. (Use the correct size of screws for optimal installation.)
- Finish the track with the provided end caps.
- With the TRACK starter set, you choose your own lamps. This selection is already adapted especially for the TRACK.
Download the manual for more information
How do I expand my TRACK?
To expand your TRACK, you need the following things:
- 1 (or more) mounting rail(s) from Lucide.
- 1 (or more) connectors from Lucide to join the rails together.
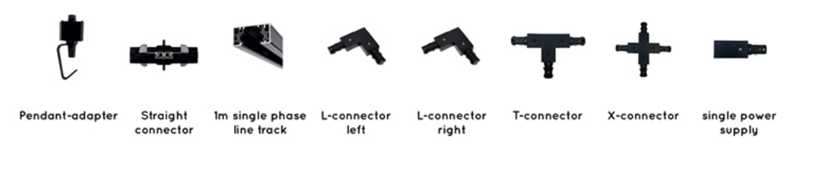
Once you have these things, you are able to further expand your track according to the same principle as the starter set. Mark where you want to place the expansion. Attach the mounting rail to your installed rail with a connector and screw it into place. You can add up to 5 lamps per metre on the TRACK.
Tips and tricks
- With the double power supply (mounting house), you can hide 1 connection.
- If you only use 1 of the connections in the mounting house, you can just click the second connection so that it is completely hidden in the mounting house. Later, you can easily click it back into place for use.
- Satisfied with your track? Use the plastic cover for an extra finishing touch.
- The TRACK starter set comes with 2 plastic covers. Whether you want to instal these is up to you. You can leave the plastic covers off for a more industrial look. If you prefer a really sleek finish, you can trim the plastic covers to the desired lengths and install these between the lamps.
Note: once the plastic covers are installed, the TRACK does lose some of its practical benefits.
- Pendant lamps too long? Shorten them before installation!
- How do I click lamps into my TRACK?
- Place 2 fingers on the adapter and press it down.
- Place the top part of the adapter in the rails with the pins in the same direction as the rails.
- Turn the adapter clockwise or counter clockwise.
- The 2 pins of the adapter must turn toward the side of the TRACK with 2 grooves.
- When you feel the adapter click when you let go of it, the lamp is correctly installed.
- An extra check: if you flip the light switch and the lamp comes on, the installation is correct.
Prefer a visual overview? See the video below!
Where the TRACK feels at home
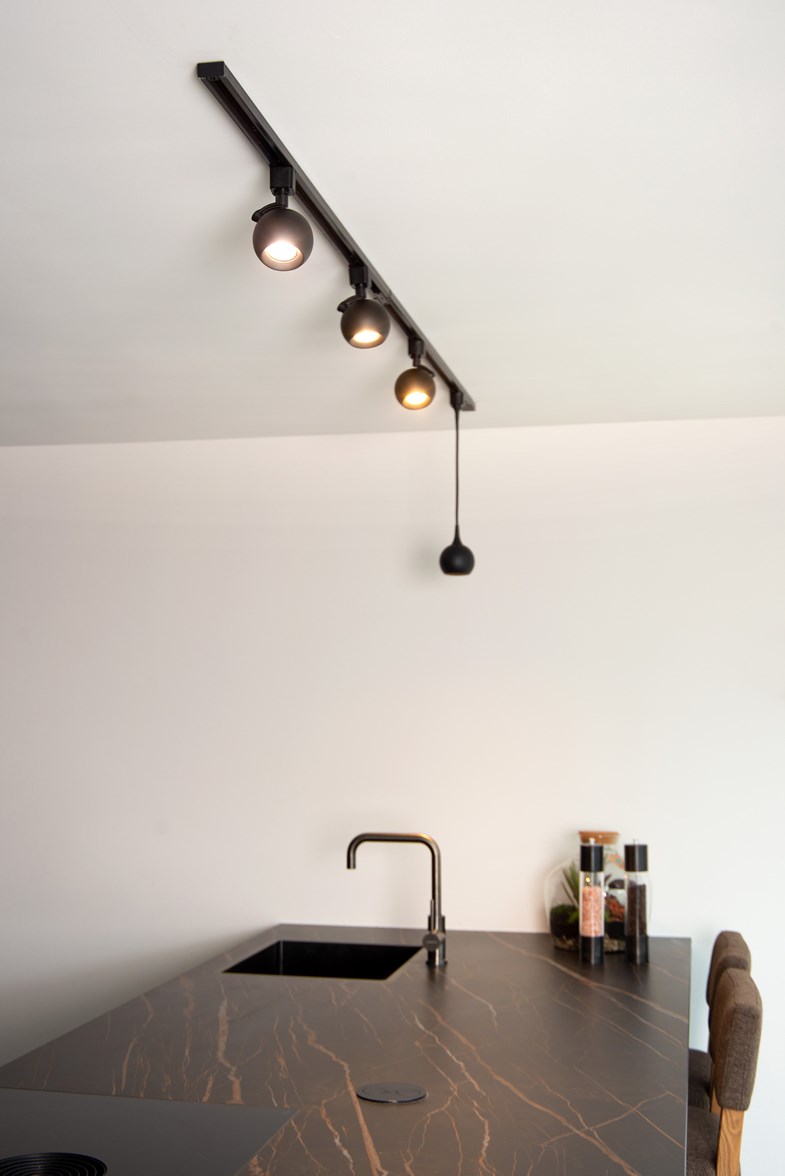
Kitchen
The TRACK comes completely into its own in the kitchen. Move and adjust your lamps to where you need them. You always have the perfect lighting where you are working. No missed bits of potatoe peel, and no fingers mistaken for carrots.
Home office
The home office is an indispensable part of business today. Of course you want to work as ergonomically as possible from home. The TRACK has your back, literally and figuratively. No more leaning forward or back because you cannot read things easily due to poor lighting. You adjust the TRACK until it is ideal for you.
Garage
A garage is often forgotten when installing good lighting. And yet this is essential. Who knows what all you can find in your garage...
Dressing room
Choosing the outfit of the day (OOTD) is a stress moment for many people. You cannot find your favourite trousers, or the colours do not match. With the TRACK, you place and direct your lamps where you want. Toward your wardrobe, like a real spotlight etc. Precisely what you need to start the day full of confidence.
Professional use
You can expand the track up to 400 m. This also makes it interesting for professional use. Instal the TRACK in offices, restaurants or in a completely different setting. Combine and move everything the way you like.
A new layout? Play with the possibilities of the TRACK to always achieve the ultimate composition.
Everywhere
The TRACK is incredibly versatile and lets you explore every option. In this blog, we summarised a few of these. But remember: in the end, the only limit is your own imagination.
Voilà, that is the TRACK in a nutshell.
Hopefully, you now have a better impression of the possibilities the TRACK rail system offers, and perhaps you have been inspired to get started. Feel free to share your ideas via our social media!